
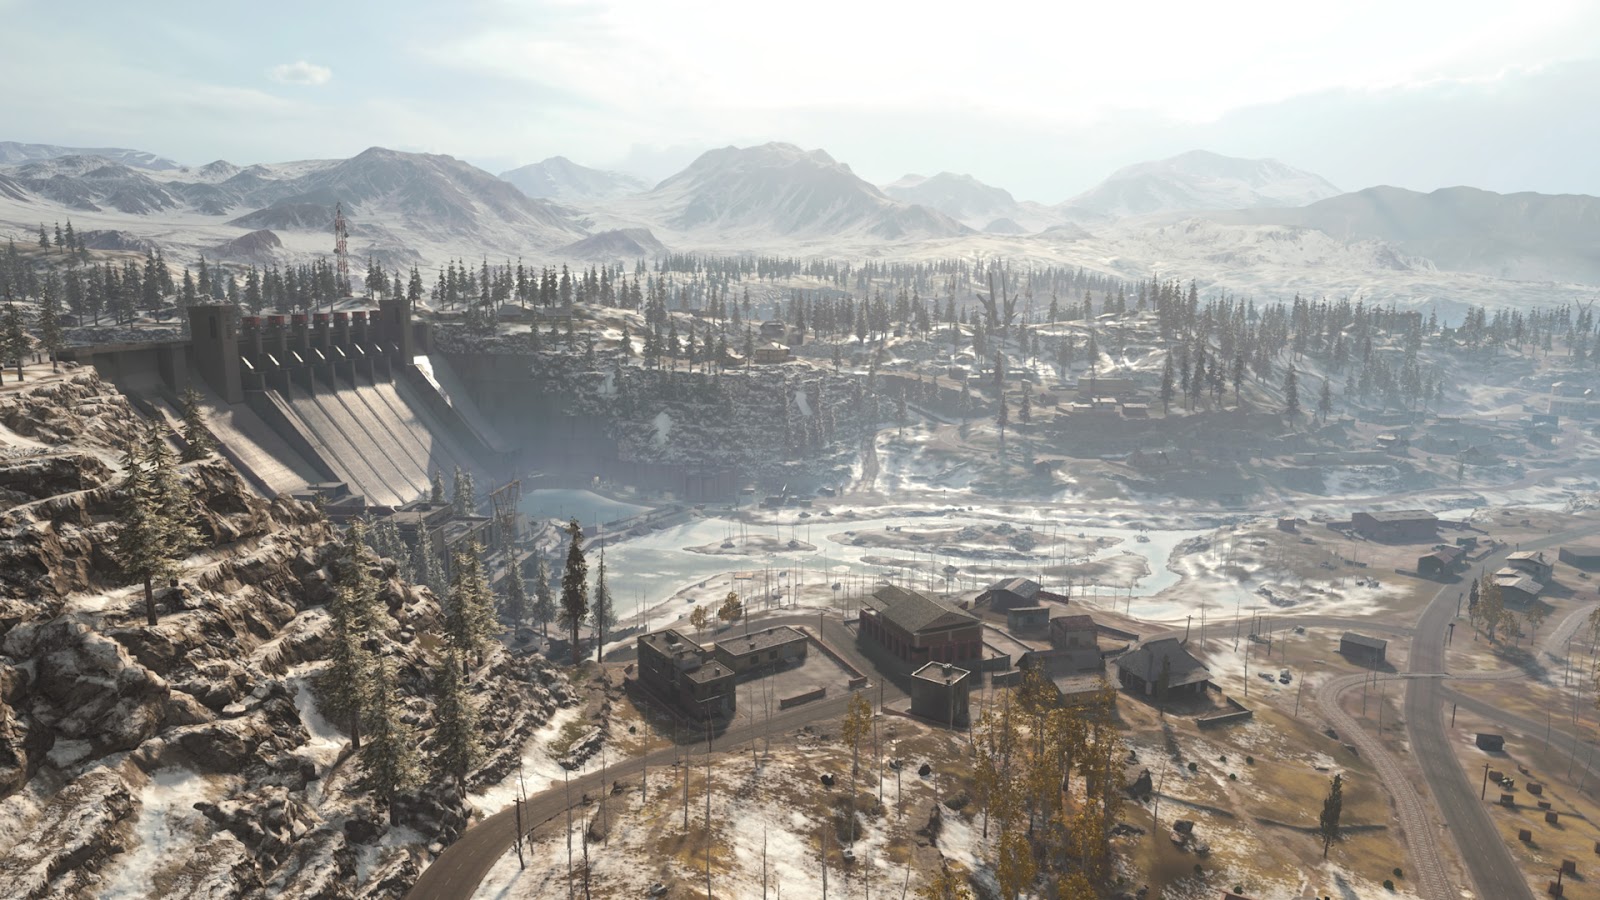
Zone 1A – GORA DAM, GORA TUNNEL, BLOC 17, BLOC 16
This page will give a detailed rundown of ZONE-1A in Verdansk North. The page will go into depth on each of the key locations, points of interest and best places to loot.
Key Locations (14)
Points of Interest (Buy Stations, Vehicles and Plunder Cash Drops)
Best Looting Places (which locations have the best chance for loot)
Best Landing Spots (our Top 3 Landing Spots in Zone 1A)
The 14 Key Locations in Zone 1A
In each of the Location descriptions below, there are ratings for a variety of features about the location, they are rated from 0-5. These ratings will help you determine based on your playstyle if this an area you would like to explore.


1 – Fire Station 74
A cluster of three buildings atop the dam, offering commanding views of the entire map, even to the Gulag itself. The Fire Station (interior) has a tower to snipe from, while the clifftop house and small garage are both interesting defensive locales, with a parachute down to the Main Generator Complex. There’s excellent road access via the main highway too, with access across the top of the dam, or onto the icy reservoir behind the dam wall.
2 – Upper Dam (Sluice Gates)

The top of the Gora dam is ideally accessed via the main highway, with a road spanning the dam, leading into Bloc 23 (east). Tremendous long-range views to the south are available, along with an escape route off the side of the dam. The dam is comprised of eight sluice gate towers (watch for foes behind the gates or on the icy reservoir below), with a maintenance tower at each end allowing interior stairwell access down, then out onto a lower gantry.
3 – Gora Dam Main Generator Complex

The main dam workings are encountered here in this tiered generator facility at the base of the western side of the dam. From the ice floor of the Gora River, you can investigate a gantry and overview channel (east), or head around to two concrete walkways, each with a bank of eight electrical transformers, and riverside access to the power plant (east). These sit in front of the main generator building (interior) with a helipad and gantry stairs to the roof. The three massive red pipes behind the building have a control room and corridors (interior) and an overflow canal. Scaling the pipes to the top of the dam offers precarious movement options.
4 – Gora Dam East Entrance

The riverside entrance is easily accessed from the road, frozen river, or by dropping down from above. A sentry hut and a two small office sheds, along with concrete barriers and sand gabions offer a degree of protection. Nearby are two giant cylinders with electrical transformers on the roof; access is available via ladder. There are two access roads; one offers a quick jaunt across to the Main Generator Complex, while the other (directly at the base of the dam) leads to a dead-end, though there’s a ladder up into the complex if you’re ditching a vehicle.
5 – Gora Dam West Entrance

Accessed via the river, dam itself, or the suburbs to the south, this dam entrance comprises two main, single level structures at the end of a curved road. Concrete and rock buttressing prevent a sentry hut, maintenance shed, and server room with office from slipping into the river. Note the defensive sandbags atop the office roof, and good road access into the Main Generator Complex. You can access the cliffs and narrow ledges northwest of the maintenance shed with the gabions if you’re after a spot of rock-climbing.
6 – M100 Divided Highway

The main arterial route along the western edge of the map continues, with two tunnels (one northeast to the Dam, and one south to the airport outskirts). A small shed is at the road junction leading down to the Police Station, and the road continues to the lower dam entrance. Feel free to explore the rugged hillside above the highway and both tunnels; this terrain is the highest point on the map and offers spectacular views of almost the entire map. Also note the ATV-sized ramp off the highway, allowing an impressive jump onto the Police Station roof.
7 – Police Station

The Gora Dam Police Station is in a moderate state of disrepair. Note the ladder and roof trapdoor from the interior; both allowing roof access. Also note the roof has a large police insignia visible; great for locating from the air. The interior of the station is set across two floors. The first floor has a reception, cells, and an interview room. Up the stairs there’s offices and a locker room, along with a roof ladder. Cross the road to a dilapidated double garage, and a grime-filled house with an upper floor to snipe from. The frozen foothills continue southeastwards, towards the airport.
8 – Brick Shed and Road Tunnel

This section of the divided highway (M100) sweeps up to the first of the Gora Tunnels, after heading under a rickety railway bridge you can traverse, ideally using a smaller vehicle. Beware the surrounding rocky terrain and slopes, as this can serve as an ambush point for those so inclined. A small brick shed mainly holds detritus inside but can act as temporary cover in a fix. Climb atop the tunnel mouth for excellent views; especially southwards.
9 – Storage Garages

On the northwestern outskirts of the airport, bisected by a main road, and with the rail bridge above (to the northwest) is a collection of single-level storage garages. There are two double garages on the east side of the road, and three green-doored storage garages on the opposite side, each with one of the garages accessible. There’s a small shed on near a dirt road on the eastern edge of this rundown collection of structures, too. While you’re not coming here for the architecture, check the area for items and hiding spots near the green doored garages and rocky outcrops under the rail bridge.
10 – Old Hamlet (NW Airport)

A small farmstead comprising two buildings has been spared demolition by the recent expansion of the airport. The weathered farmhouse has an accessible interior, and a loft-like upstairs area with a choice sniping window overlooking the airport and highway. Close by, above the farmhouse is a small field of hay bales, and a nearby secondary building; a single-level residence. Look for this as a marker when you’re maneuvering down to the Runway Underpass (Zone 2A).
11 – Dam Outskirts and Public House

Follow the road from the divided highway, or along the northern airport perimeter, to reach a small settlement on the lightly undulating frozen slope south of the dam. Here you’ll find a cluster of around a dozen residential structures, with two small office buildings a two-floor pub occupying the dominant location (with the red arched windows, and a sign that translates to Sergio’s Restaurant Bar and Grill). Bisected by a railway track (south) and the end of the river (north), most structures have interiors to investigate or hide in. Use this as a staging location when traversing to or from the dam or airport, and optionally use upper floors or rooftops for better visibility of the map to the south and east.
12 – Frozen Islands

Avoid at all costs!! The north river is halted by the Gora Dam further upstream, and the river itself is extremely shallow, as well as being iced over. A few dotted islands can be traversed, offering little in the way of cover (outside of the rock outcrops and narrow beach saplings). A better bet is to use this to pass through, ideally in a vehicle; you’re very exposed and easily spotted from the higher ground surrounding you on three sides.
13 – Village: Bloc 16

Further east along the main east-west road running just north of the airport perimeter is a small village, jammed in between the airport and the river (north). Located on the flatter river flood plain, and bisected by the main road and rail line, there’s a modicum of cover to be had when dashing between the dozen-or-so scattered buildings. These range from a brick warehouse and tiny stone shed (north), a trio of sheds near a small, two-floor white house with a corrugated roof (center), a green storage garage, two modest homes with upper floors, and a yellow apartment structure closest to the airport. The mainly flat ground means flitting from structure to structure is the safest way to navigate these parts.
14 – Airport Sheds

Look for the radio antenna near a small blue shed to pinpoint this trio of storage structures nestled between the airport perimeter and the bank of the Gora River. There’s a double garage with some rather pleasant tile work, as well as “Warehouse 4”; a small blue-and-white corrugated structure that’s open to access. The area provides quick (but open-air) access to the runway, or an escape path into the northern hills, including a drop down from the warehouse exterior to the riverbank. Note the shallow pond here; if your opponents’ footfalls change to splashes, you know exactly where they are.
Zone 1A – Points of Interest: Buy Stations, Vehicles & Cash Drops
There are 8 Buy Stations, 8 Vehicles and 1 Plunder Cash drop in Zone 1A. The Helicopter spawns near location 3, the main generator complex. Beware the Plunder Cash Drop as it is out in the open near the Frozen Islands.

Buy Stations
The Buy Stations on Zone 1A are situated near the following Locations:
Locations 1, 2, 3, 4, 7, 9, 11 & 13
Vehicles
There are 8 vehicles in Zone 1A.
1 – Helicopter – Location 3
2 – Cargo Trucks – Locations 1 & 4
1 – Tactical Rover – Between Locations 5 & 11
4 – ATV’s – Locations 7, 11, 13 & 14
Plunder Cash Drop
Located between Locations 5, 11 & 12 near the Frozen Islands.
Best Looting Locations
The Best Looting Locations in Zone 1A are the following, based on the Loot Ratings. Max Rating 5
Location 3 – Main Generator Complex – 3/5
Location 5 – Gora Dam West Entrance – 3/5
Location 7 – Police Station – 3/5
Location 11 – Dam Outskirts and Public House – 3/5
Location 13 – Village: Bloc 16 – 3/5
Best Landing Spots in Zone 1A
Based off of all the information above, here are our top 3 suggested landing spots in Zone 1A
#1 – Location 3 – Main Generator Complex.

This area offers verticality, plenty of cover, good looting opportunities as well as spawns a helicopter nearby. In addition to this, it is not far from the Plunder Cash drop. There are plenty of areas to explore and offers some seclusion from the enemy teams. This is a great place to expore, stock up on loot, then make a quick exit in the Helicopter to other areas of the map if need be.
#2 – Location 11 – Dam Outskirts and Public House

Located in Bloc 17, this area has good interior space, plenty of cover, good looting opportunities as well as spawns a tactical rover and ATV nearby. It too is not far from the Plunder Cash drop. There are plenty of areas to explore and offers some seclusion from the enemy teams. This location can provide a good stronghold to overwatch the areas to the south and east.
#3 – Location 13 – Village: Bloc 16

The village Bloc 16 provides a good place to get in, find some loot, hit a buy station, then hop on an ATV and move on. Although it doesn’t provide much cover, it is highly accessible and allows you to get in, and get out. If you’re looking for mobility with some early options to loot and buy, check out this location.
Honorable Mention: Police Station
Go Back to Verdansk North Page.
Headsets
Controllers
Gaming Chairs
Keyboards, Mice, Keypads